Are you looking for a fun and educational spring project? Hatching your own chicken eggs is a rewarding experience. If you've been pondering expanding your backyard chicken flock, learning how to incubate and hatch your own eggs is a great way to get started. Below is a complete guide to ensure you are educated and prepared to successfully hatch your own chicks.
Step 1: The Incubator
Some incubators come with all the bells and whistles, but the most basic features must accomplish a few needs: good ventilation, temperature and humidity control. Extra features that may help ease the stress of the process and increase hatch rates include:
- A fan to circulate air and increase ventilation
- An automatic egg turner
- Digital display for temperature and humidity
- Hatch day countdown
You should set up and run your incubator for at least 1-2 days prior to placing the fertilized eggs inside. This period will allow you time to ensure all equipment is working properly, the temperature and humidity levels have stabilized and time to make any necessary adjustments for a successful hatch.
The location you place the incubator is just as important as keeping regular temperature and humidity! Keep the incubator in a room with constant temperature control, out of direct sunlight and away from any drafts. Also, make sure that your incubator is located where children and pets will not bump or disturb them during the 21 day incubation period.
Step 2: The Environment
In order for eggs to develop and hatch properly, you will need an incubator with a very accurate thermometer and hygrometer to monitor temperature and humidity. If you maintain the recommended guidelines, you should have a successful hatch in just 21 days!
- Temperature
- Forced-air incubator (with a fan): 99.5 degrees F (acceptable range 99-100)
- Still-air incubator: keep between 100 - 101 degrees F
- Humidity
- First 18 days: 45-55% relative humidity
- Final 3 days: increase humidity to 60-65% humidity
It is not as critical for the eggs to maintain a precise humidity in the incubator, and you may notice the humidity will fluctuate. During winter months the humidity may be difficult to keep high enough and in the summer you may struggle to keep the humidity low enough. Follow your incubator manufacturer’s directions for how best to maintain humidity for your specific model. Generally, you add humidity by increasing amount in water reservoir and you lower humidity by allowing more fresh air intake.
Step 3: Place the Eggs
You should NOT place shipped eggs directly into an incubator upon their arrival. They need 24-48 hours to settle and allow the yolks to reach room temperature. Setting cold eggs directly into a warm and humid incubator upon arrival will cause the eggs to crack and the embryos will die, resulting in an unsuccessful hatch.
Always wash your hands before handling hatching eggs to prevent bacteria from entering the porous shell. Place the eggs into a cardboard carton with the pointed end down and set in a quiet spot in the same room as the incubator. If you are holding the eggs for longer than 24 hours before beginning incubation, prop one end of the carton up a few inches. Rotate which end is propped up approximately every 12 hours. This helps prevent the embryo from sticking to the shell membrane.
HELPFUL TIP: When you are ready to place the eggs into the incubator, mark an X on one side of the shell, and an O on the other end. During the incubation period, you will rotate the eggs frequently. Marking the shell helps you visualize that they have all been turned properly. Even if you have an automatic turner in your incubator, marking helps you ensure that the turner is working.
Step 4: Incubation Period
Days 1 - 17
If you don't have an incubator with an automatic turner, you will turn eggs frequently by hand during this period. Although opening the incubator results in loss of temperature control and humidity, more frequent egg turning results in higher hatch rates. Eggs should be turned every 6-8 hours to avoid the embryo sticking to the shell membrane. Along with frequent turning, you must also keep a close eye on your temperature and humidity levels during this period. Temperature should be kept at 99.5° F in a incubator with a fan, and between 100° and 101° F for still air incubators. Relative humidity should be kept between 45-55%.
TIP: Candling Eggs
Candling eggs is the process of using a high-powered light source to see the growing embryo inside the shell. Between days 7-14, you are able to see the most growth. On day 7, the embryo will be a small dark spot with spider-like vessels branching out from it. At day 14, the embryo will be much larger and the egg will be hard to see through. You will still be able to see a small air sac at the large end. Candling also gives you a good opportunity to check if eggs are still viable and growing. Any underdeveloped or rotten eggs should be discarded.
Step 5: Lockdown
Days 18-20
The period is referred to as "lockdown" because you stop turning the eggs and opening the incubator until after the chicks have hatched and dried. On day 18, stop turning eggs manually or turn off the automatic egg turner. At this point in the process, the chicks are almost fully developed and will begin to position themselves for hatching. You will also increase the humidity during this time to 65-70%. The day before chicks hatch, prepare the brooder.
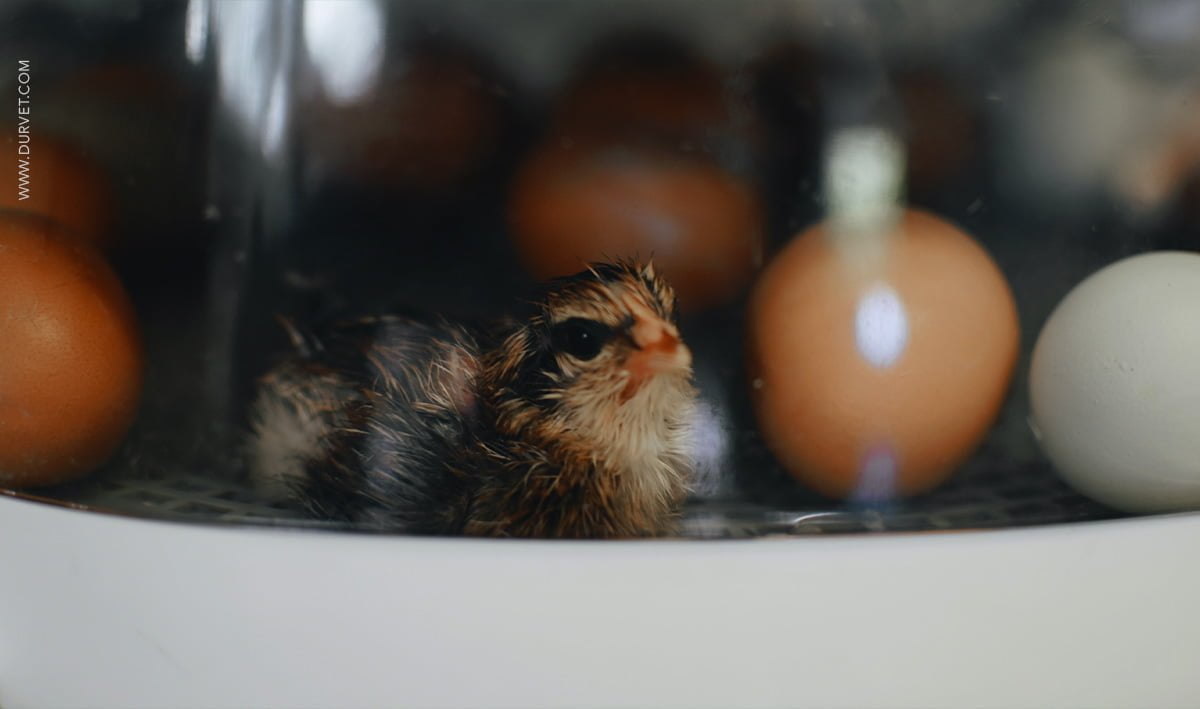
Step 6: Hatch Day
On day 21 you will begin to hear peeping from the inside of the eggs. Some of the eggs will likely begin to rock around a bit as the chick pecks on the shell and repositions itself. Hatching takes a lot of energy and it will be a slow process usually taking a full 24 hours for all chicks to complete the hatch. Make sure that the chicks are completely dry and fluffy before opening the incubator and moving them into the brooder. The first-hatchlings will be okay to go 24 hours without eating or drinking while they wait for all other chicks to hatch. Some chicks may struggle to hatch, but do not assist. It is possible that there is something wrong with the chick and taking action to help the chick out can lead to you finding out that chick is ill or disabled.
Step 7: Clean Up
After the whole process is complete, thoroughly clean and disinfect the incubator and all parts involved for the next use. A bleach solution is great for sanitizing.
Happy Hatching!
Sources: Meyer Hatchery, Purina Mills
 BACK TO MAIN BLOG
Comment